


Mastering the Studio Ghibli Aesthetic with AI: A Step-by-Step Guide
Studio Ghibli’s art style is cherished for its warmth, whimsy, and hand-painted charm. With AI image generators, anyone can now attempt to recreate that magical aesthetic in their own artwork. This guide will walk you through understanding what makes the “Ghibli look” special, and how to achieve it using tools like Midjourney, DALL·E, and Stable Diffusion. We’ll cover key visual elements of Ghibli films, prompt engineering tips for each AI tool, technical settings, and best practices for beginners and pros alike. Let’s dive into this enchanting world of AI-generated Ghibli art!
photo reimagined in the Studio Ghibli style using an AI image generator (left) compared to the original photo (right). AI tools like OpenAI’s DALL·E 3 (via ChatGPT-4) can convincingly apply Ghibli’s aesthetic to real images, a trend that went viral among users creating “Ghibli-fied” family portraits.
Step 1: Understand the Key Elements of the Ghibli Aesthetic
Before crafting prompts, it’s crucial to know what visual traits define Studio Ghibli’s unique blend of art and storytelling elements:
Soft, Harmonious Color Palettes: warm, muted tones and gentle gradients for a dreamy atmosphere. Lush greens color the forests; warm earth tones paint villages; moody blues and grays set melancholy moments. Color is a narrative tool – bright hues convey joy or nostalgia, while subdued colors signal calm or sadness.
Expressive Yet Simple Characters: Ghibli characters have clean designs with large, emotive eyes and friendly, rounded features. Facial details are kept simple (small noses, subtle mouths) to emphasize expression and sincerity. The eyes especially convey wonder and warmth. Characters move with fluid, natural motions as if drawn frame-by-frame, contributing to an authentic, hand-animated feel.
Lush Natural Scenery: Detailed backgrounds are a hallmark. From sweeping hills to dense forests, nature is rendered with care – every leaf, cloud, and ray of light is considered. Many backdrops draw from the Japanese countryside or idyllic European villages, full of ancient trees, wildflowers, and clear skies. This ever-present nature creates a tranquil, “cozy” atmosphere where the environment feels alive.
Whimsical & Fantastical Touches: Ghibli seamlessly blends magic with reality. Ordinary settings might hide playful spirits, creatures like Totoro or the Catbus, or other fantastical elements woven into everyday life. This subtle magical realism makes even simple scenes feel enchanted without overt explanation.
Emotional, Heartwarming Themes: The art always serves an emotional narrative. Ghibli images evoke feelings of nostalgia, wonder, scenes often capture intimate, heartfelt moments – a hug between friends, a quiet meal, a child’s curiosity – illustrated in a gentle, sincere tone. There’s an underlying warmth and humanity in the visuals that resonates with viewers.
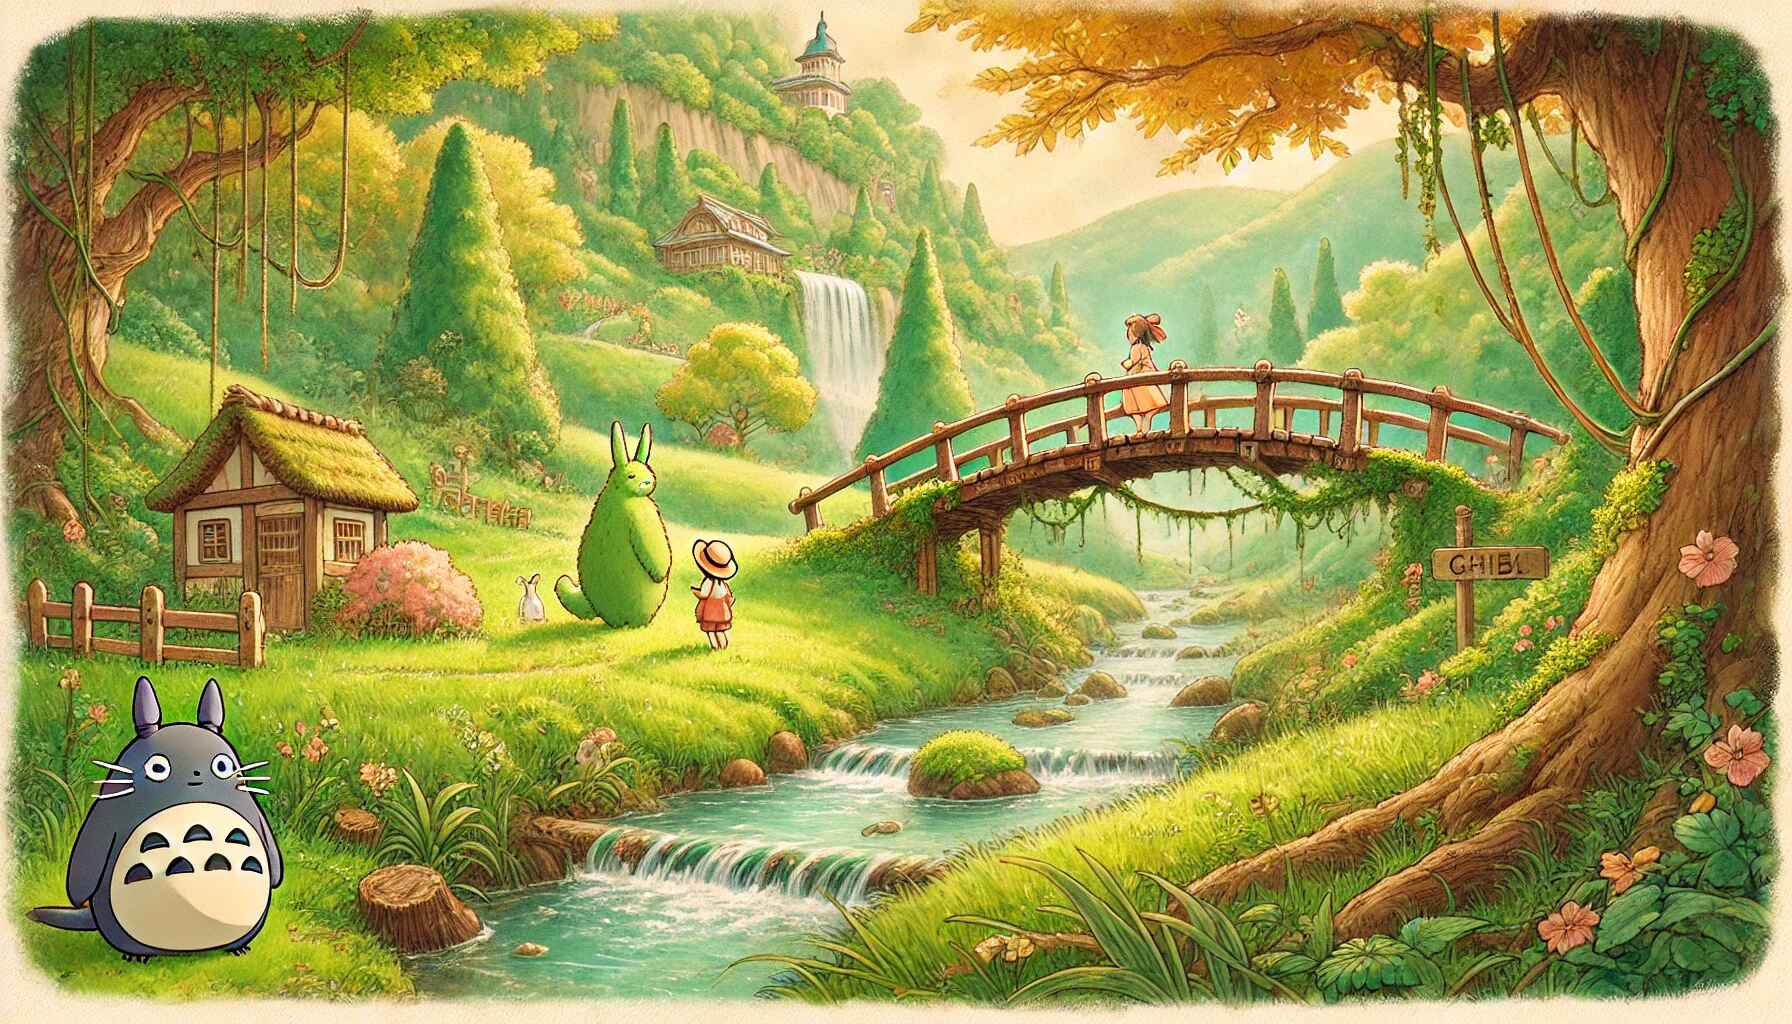
By keeping these traits in mind – soft colors, expressive characters, detailed nature, subtle magic, and heartfelt mood – you’ll be able to guide AI models to produce images that look like they came straight out of a Miyazaki film. AI-generated Ghibli-style landscape. Note the vibrant yet soft sky colors and the serene water reflections – hallmarks of Studio Ghibli’s hand-painted backgrounds and harmonious color palette. Such detailed nature scenes, with their whimsical clouds and gentle lighting, are key to the Ghibli aesthetic.
Step 2: Draw Inspiration from Iconic Ghibli Films
To effectively recreate the Ghibli vibe, study some famous scenes and imagery from Studio Ghibli movies. Each film showcases the core aesthetic in its own way:
My Neighbor Totoro film exemplifies Ghibli’s love of nature and gentle fantasy. The protagonists’ house is surrounded by sun-dappled forests, lush foliage, and rice paddies teeming with life. The forest spirit Totoro and the iconic Catbus are introduced as friendly, whimsical creatures, adding magic to the otherwise ordinary rural setting. The color palette is warm and earthy for daytime scenes (bright greens and blues), shifting to deep indigo at night – capturing both the joy and mystery of the countryside. Overall, Totoro’s scenes f cent, and full of childlike wonder.
Spirited Away (2001): Known for its rich imagination, this fihe mundane with the fantastical. A simple trip to a new town leads 10-year-old Chihiro into a bustling *spirit world an ornate bathhouse. The bathhouse interior is rendered in elaborate detail – from wooden beams and lantern light to hundreds of unique spirit characters – demonstrating Ghibli’s intricate design. Equally memorable is the quiet train ride over flooded plains: Chihiro and No-Face sit in reflective silence as the sun sets over water, a scene that uses gentle lighting and stillness to evoke deep emotion without any dialogue. Spirited Away shows how Ghibli’s aesthetic can be at once vibrantly fantastical (otherworldly creatures, glowing night scenes) and profoundly serene (open landscapes, silent moments).
Princess Mononoke (1997): This film’s visuals are a stunning homage to the power of nature. It features sprawling ancient forests inspired by Yakushima’s woods, sacred giant deer and wolf spirits, and swirling wisps of magic amid the trees. The forest scenes are dense with greenery and mist, creating an awe-inspiring atmosphere. Mononoke’s themes of environmentalism also come through in the imagery: the clash between iron-age humans and the forest gods is depicted with vivid intensity. Expect a slightly darker palette here – rich forest greens, earth tones, and nighttime blues dominate – yet the scenes remain beautiful and richly detailed. The characters (like San and the Forest Spirit) are drawn in the realistic yet emotive Ghibli style, and even the “villain” Lady Eboshi is portrayed with nuance and compassion in her expressions. Use Mononoke for inspiration when you want a majestic, dramatic nat with serious tone but still unmistakably Ghibli in design.
Howl’s Moving Castle (2004): This film merges a quaint European-inspired setting with whimsical magic. Early scenes show a charming old town and cozy hat shop in soft light, but soon we meet Howl’s literal moving castle – a ramshackle, walking mechanical house full of odd charm. Ghibli’s art brings this contraption to life with detailed clanking parts, yet it remains endearing rather than industrial. The color schemes shift from the pastel hues of Sophie’s hometown to the smoky grays of war machines in the distance, illustrating the film’s anti-war theme. Howl’s magic battles produce dazzling visuals, but equally striking are the quieter moments: e.g. Howl and Sophie strolling in a field of flowers under a bright sky. Howl’s Moving Castle is great inspiration for combining steampunk elements (the castle, flying ships) with the soft, natural beauty of Ghibli’s style. It demonstrates how fantasy meets reality in Ghibli worlds – an ordinary young woman is cursed into an old body and finds refuge in a magical castle, yet everything is presented in a matter-of-fact, believable way.
As you craft prompts, think of these examples – the lush Totoro forest, the enchanted Spirited Away bathhouse, the ancient Mononoke woods, the whimsical moving castle – and identify the visual motifs you want to emulate. Noting these iconic scenes will help you describe your image in a way that channels the same mood and detail.
Step 3: Craft Effective Ghibli-Style Prompts (General Tips)
When you’re ready to generate an image, the prompt you write is everything. Here are some prompt engineering tips to invoke the Ghibli aesthetic across any AI platform:
Mention the Style Explicitly: Include keywords like “Studio Ghibli style”, “Hayao Miyazaki-inspired”, or “Ghibli animation style” in your prompt. This gives the AI a clear stylistic target. Modern image models understand these phrases and will bias the result towards whimsical, hand-painted anime visuals. You can also name-drop specific films or directors (e.g. “in the style of Spirited Away”) if the tool allows it – this often helps nail the exact vibe. (Note: Some platforms have restrictions on using certain film or artist names. If direct references are blocked, use descriptive terms instead. For example, instead of “Hayao Miyazaki”, say “in a hand-painted Japanese animation style”.)
Use Whimsical, Descriptive Adjectives: The Ghibli look is often described as whimsical, enchanting, gentle, dreamy, lush, and nostalgic. Including such adjectives in your prompt will guide the AI toward the right mood. For example: “a whimsical, Ghibli-style village at dusk, with dreamlike lighting and an enchanting forest backdrop.” These words emphasize the storybook, feel-good atmosphere common in Ghibli scenes.
Highlight Nature and Atmosphere: If your scene is outdoors or involves nature, emphasize those elements – e.g. “ancient tree roots wrapped in moss,” “field of wildflowers swaying,” “dramatic sunset clouds”. Ghibli backgrounds are famously detailed, so painting a picture with words of the environment’s richness will cue the AI to include it. For instance, specifying “intricate flowers and grass” tells the AI to include the signature detailed flora seen in films like Totoro or Arrietty. Don’t forget lighting and weather terms too: “golden afternoon light,” “morning mist,” “starry night sky”, etc., to set the atmosphere.
Incorporate Themes or Motifs: You can add thematic keywords that capture Ghibli’s spirit. Words like nature, friendship, adventure, magic, nostalgia, or coming-of-age can subtly influence the composition or feeling of the image. For example, including “a sense of friendship and wonder” in your prompt might encourage the AI to make characters interact warmly or appear awestruck by their surroundings – very much like moments in Ghibli films.
Be Specific with Characters and Objects: If your scene includes characters or focal objects, describe them in detail. Ghibli characters often have distinguishing yet simple features (hairstyles, clothing) and expressive postures. For instance: “a young girl with a red bow in her hair and curious big eyes,” “a round, fluffy forest spirit with a broad grin”. These concrete details help the AI create a character that fits the Ghibli mold. Likewise, name any important props or architecture (e.g. “red bridge over a river” might evoke the bridge to the bathhouse in Spirited Away). Specifics make for more authentic results.
Consider Composition Keywords: To really get that cinematic feel of a Ghibli film, you can hint at composition. For example, adding “wide angle” or “panoramic” for sweeping landscapes, or “close-up portrait” for character focus. Including terms like “cinematic” or “movie still” can also prompt the AI to add a bit of that film-like polish. This might translate to dramatic framing or lighting akin to an animation movie scene. Use these sparingly to ensure the image still follows your content, but they can enhance the storytelling vibe.
When writing the prompt, imagine you are describing a scene to an artist – the more vividly you can picture it and communicate it (while staying concise), the better the AI can render your vision. Next, we’ll apply these tips to specific AI tools, since each has its own workflow and settings.
Step 4: Using Midjourney for Ghibli-Style Images
Midjourney is a popular AI image generator known for its high-quality, artistic outputs. It runs through a Discord bot interface. Here’s how to get Ghibli-style art with Midjourney:
Access Midjourney on Discord: Join the Midjourney Discord server and use the /imagine command to generate images. (Midjourney requires a subscription after a free trial.) In a Discord channel where the bot is active, you’ll type your prompt after the /imagine keyword.
Enable the Anime (Niji) Model: Midjourney has a special “Niji” model tailored for anime-style imagery. Using it is essential for closely replicating the look of hand-drawn animation. To invoke it, add the parameter --niji 5 at the end of your prompt (or select the Niji model in settings). Version 5 of Niji is the latest and produces refined, consistent anime-style results, capturing the whimsical and fantastical elements characteristic of Studio . (Midjourney’s default model can do Ghibli-like art too, but Niji will generally give a more authentic anime flavor.)
Write a Ghibli-Themed Prompt: Now, input your scene description following the tips from Step 3. For example: /imagine prompt: **Studio Ghibli style** portrait of a young adventurer standing in a mystical forest, dappled sunlight through trees, **warm, whimsical** atmosphere --ar 16:9 --niji 5 . In this prompt, we explicitly call out “Studio Ghibli style” and use vivid detail, plus we set a widescreen aspect ratio (--ar 16:9) which is great for landscapes. We also included Niji mode. Midjourney allows various parameters – here we used aspect ratio; you could also try --stylize or --s (see Step 7) and others. You can even ask ChatGPT to help wordsmith a Midjourney prompt (e.g., “Give me a prompt for Midjourney of a Ghibli-style forest scene”) and it might produce something like “Studio Ghibli style illustration of a tranquil forest with a tiny wandering spirit, soft lighting and rich details”. Feel free to use such assistance to refine your prompt wording.
Generate and Review Outputs: Once you submit the prompt, Midjourney will generate 4 image variations in about a minute. These will appear as a 2x2 grid. Examine each to see which best matches what you envisioned. Often, all will have a Ghibli-esque vibe (Midjourney is quite good at mimicking art styles, sometimes even more painterly detail than DALL·E). But you can choose the one you like most to refine further.
Upscale or Variate the Chosen Image: Use Midjourney’s buttons (labeled U1–U4 for upscaling, V1–V4 for variations) on the grid to select an image. Upscaling (U) will enlarge and enhance the details of that particular image. Variation (V) will generate new grids based on that image’s composition. For example, if image #2 looks promising, hit U2 to upscale it to a full-size output, or V2 to get similar alternatives. After upscaling, Midjourney will post the final single image – you can further upscale to max or make slight variations again if needed. This process lets you zero in on the perfect result.
Refine with Prompt Tweaks if Necessary: If none of the initial 4 images are satisfactory, don’t fret – iterative tweaking is normal. Try adjusting your prompt and hit /imagine again. You might add more detail, or remove something that came out weird. For instance, if the style wasn’t Ghibli enough, ensure you included phrases like “Ghibli” or an artist name. If an unwanted object appears, you can use Midjourney’s negative prompt feature --no. For example, appending --no text will try to eliminate any text or letters in the image (this is useful if the AI inscribed gibberish text on a sign, etc.). Midjourney might require a few attempts to nail exactly what you want, since it has some randomness and multiple interpretation freedom. Use each round as learning: refine wording, add or subtract style cues, or try the remix mode (which allows editing the prompt between variation generations).
Save the Final Image: Once you get an image you love (upscaled to the desired resolution), open it in full and save it to your device. You now have a Ghibli-styled artwork ready to share! 🎉
Midjourney specific tips: Using --stylize can influence how strictly the bot follows your prompt versus adding its own artistic flair. A low stylize (e.g. --s 50) makes the image more literal to your description, while a high stylize (e.g. --s 1000) gives Midjourney more freedom to be creative. Finding the right balance can help — Ghibli style usually benefits from some creativity (to capture that magical feel) but you also want it to stick to the theme. Start with the default (stylize 100) or medium and adjust if needed in subsequent tries. Also, remember Midjourney’s Niji model already biases towards anime magic; if you find the results too anime or cartoonish, you could experiment with the standard model, but generally for Ghibli, Niji is ideal.
Step 5: Using DALL·E 3 (via ChatGPT) for Ghibli-Style Images
OpenAI’s DALL·E 3 is another excellent tool for creating Ghibli-style art, and it’s conveniently integrated into ChatGPT for users with ChatGPT Plus. DALL·E’s strengths are understanding complex prompts and following iterative instructions well. Here’s how to use it:
Launch ChatGPT with DALL·E 3: In ChatGPT (web or mobile app), select the GPT-4 model and ensure the “Vision” or image generation feature is enabled (ChatGPT Plus users got this in late 2023). This allows you to generate images directly by prompting ChatGPT. There will be a little image icon (a plus sign) in the chat input – that’s for attaching images or switching to image mode.
(Optional) Upload a Reference Image: One fun feature is the ability to “Ghibli-fy” a photo of your own. If you have an image (say, your portrait or a simple sketch) that you want transformed, you can upload it in ChatGPT first. After the image is attached, you might write something like “Turn this into a Studio Ghibli style illustration.” This image-to-image transformation was a viral use case – people took selfies or family photos and had ChatGPT re-draw them in Ghibli’s anime style (as shown in the example image earlier). The AI will interpret the content of your photo and apply the Ghibli aesthetic to it. This is a powerful way to get personalized Ghibli art. If you don’t have a reference image, just proceed with a text prompt for a fresh scene.
Enter Your Prompt: You can either describe a scene from scratch or give a transformation command if you uploaded a photo. For a new scene, type something like: “A calm village at style.” This would be a straightforward text-to-image prompt describing the desired output. If you had uploaded an image, you could say “Ghibli-s scene” or even simply “Ghiblify this” – ChatGPT will understand you want the uploaded image redrawn in the target style. The model is quite good at picking up context, so a short instruction can suffice when an image is provided.
Generate the Image: Hit Enter and let ChatGPT (with DALL·E under the hood) do the work. It will typically produce 4 variations for you, either one by one or as a panel, depicting the scene you described. For example, if you prompted the Ghibli-style village, expect a few different compositions of a quaint anime village at sunset. If you transformed a photo, you’ll see your subject now illustrated as a Ghibli character or setting in several styles. This multi-image output is great for choosing the best version.
Review and Refine: Look at the results and see if one matches your vision. With DALL·E via ChatGPT, you have the advantage of an interactive feedback loop. If an image is close but not perfect, you can literally tell ChatGPT what to change: “Make the colors softer and more pastel”, or “Add some cherry blossom trees in the background like in a Miyazaki film”. Because ChatGPT understands nuance, it will adjust the prompt and regenerate the image with those changes. This iterative refinement is a huge perk – you don’t need to craft a brand new prompt from scratch each time; just instruct in plain English and the AI will tweak the details for you. You can do this several rounds until you’re happy. For instance, you might go back and forth adding elements (a character, a bit of fog, etc.) or removing elements until the image feels just right.
Save Your Ghibli Masterpiece: Once you have an image you adore, use the download button or right-click to save it. ChatGPT will usually show the images inline; hover or click to find the download option. Now you’ve got your AI-generated Ghibli-style image ready to use.
Alternatives if You Don’t Have ChatGPT Plus: If you don’t have access to the integrated DALL·E 3 in ChatGPT, you can still use DALL·E via other means. One way is to use the Bing Image Creator (which is powered by DALL·E 3) – it’s free and you can paste the same prompts there. Another is the OpenAI DALL·E web beta (if available). You can even use ChatGPT free just to help you write the prompt (describe your idea and ask it to produce a detailed prompt), then copy-paste that into Bing Image Creator. The key point is that DALL·E 3 understands the Ghibli style well; even a simple prompt like “a friendly forest spirit, Ghibli animation style” will likely yield great results. So leverage whatever access you have to DALL·E, and remember that refining via iterative prompts (even if manually) can improve the outcome.
DALL·E specific tips: DALL·E does not require technical parameters like aspect ratios or step counts – it infers everything from the prompt. However, you can certainly mention aspect ratio in the description (e.g. “widescreen scene of…”). DALL·E tends to produce fairly high resolution square images by default. If you need a different aspect, you might crop later or use outpainting. Also, DALL·E might sometimes include unwanted text or artifacts in images (though much less so in version 3). If it does, just regenerate or use a negative phrase in the prompt like “no text.” One more tip: DALL·E has some content restrictions and might refuse prompts that reference specific copyrighted characters (it may or may not allow naming Totoro, for instance). To be safe, focus on descriptive style rather than exact character names (use “giant cuddly forest spirit” instead of “Totoro”) if you run into any compliance issues.
Step 6: Using Stable Diffusion for Ghibli-Style Images
Stable Diffusion is a powerful open-source image generator that offers the most flexibility. You can run it on your own PC (with a GUI like Automatic1111’s WebUI) or use hosted web services. While it requires a bit more setup and tinkering, the payoff is complete control – you can even use custom models trained specifically on Ghibli art. Here’s how to master Ghibli style with Stable Diffusion (SD):
Choose a Platform or Model: Decide how you’ll run Stable Diffusion. If you have a capable GPU and some technical know-how, running it locally gives you maximum control. Otherwise, there are user-friendly options like DreamStudio (by Stability AI), Stablecog, Getimg.ai, etc., which run SD in the cloud. Many of these have free trials or modest fees. Critically, check if they offer a Studio Ghibli model or filter. For example, getimg.ai has a “Studio Ghibli generator” option which uses a fine-tuned model for more authentic results. The community has created a well-known custom model called “Ghibli Diffusion” (by Nitrosocke) which was trained on Ghibli film imagery. If you use that model (available on Hugging Face and some UIs), simply including the token “ghibli style” in your prompt will activate its style. In short, pick a setup you’re comfortable with, and try to use a specialized Ghibli model for best results (you can still get decent results with the base SD model + good prompting, but a fine-tune makes it easier).
Write a Detailed Prompt (ChatGPT can help): Compose your prompt describing the scene, much like we discussed in Step 3. Because Stable Diffusion often benefits from well-crafted prompts with style tokens, you might go a bit more detailed here. For instance: “ghibli style, a young girl and a large cat-like spirit sit on a tree branch under a twilight sky, warm glow, whimsical and serene atmosphere”. Notice we included “ghibli style” at the start – this is important if you’re using a model that recognizes that token. You can also add artist names or art styles: many SD models know artists like Hayao Miyazaki or Yoji Kondo (Ghibli artists), so a phrase like “art by Hayao Miyazaki” can further tune the output (though use such phrases responsibly; some platforms might flag famous names). If you’re unsure how to phrase the prompt, use ChatGPT (even the free version) to brainstorm – e.g. “Describe a Ghibli style scene of a boy finding a forest spirit”, and it will generate a nice prompt you can copy into SD . Stable Diffusion gives you the freedom to try multiple prompts quickly, so don’t hesitate to iterate.
Set Parameters (Resolution, Steps, CFG, etc.): In your Stable Diffusion interface, you’ll have various settings to adjust before hitting generate:
- Resolution / Aspect Ratio: Decide your image size. Ghibli films are 16:9 widescreen, so you might use a resolution like 512x288, 768x432, etc., for wide shots (or simply use the aspect ratio option if available). For character portraits, a vertical orientation (e.g. 512x768) might be better. Keep in mind extremely high resolutions might not generate well in one pass – a common workflow is generate at a moderate res and upscale later (see step 6).
- Sampling Steps: This controls how many diffusion iterations to run. More steps can yield more refined detail up to a point. A typical range is 20–50 steps; you can go higher (like 50–100) if you want very fine detail and have time. Ghibli style, with clear painted look, ...(continued)
Set Your Parameters (Resolution, Steps, Guidance, Negatives): Configure the generation settings in your SD interface. Choose an appropriate resolution or aspect ratio for your image (e.g. a wide 16:9 shot for landscapes, or a taller ratio for character portraits). Ghibli backgrounds benefit from wider canvases to capture expansive scenery. Next, select a sampler and number of inference steps – around 20-50 steps is a good starting point (higher steps can yield more detail up to a limit). Set the CFG Scale (guidance strength) to moderate values (typically 7–9) so the image closely follows your prompt without being over-constrained. A lower CFG (~5) gives the AI more creative freedom (more randomness), while a very high CFG ( >12) forces it to stick to the prompt (but can introduce artifacts). Finally, make use of negative prompts if the tool supports them. This is a critical step for clean results: in the negative prompt field, list things you want to avoid. Common negatives for Ghibli-style art might include terms like “blurry, low-resolution, realistic, 3D, text, watermark, extra limbs, bad anatomy”. For example, many users add “blurry” to negatives to ensure the output is sharp. These help the AI steer clear of typical pitfalls (like distorted faces or unwanted text).
Generate the Image and Evaluate: Now hit the Generate button and let Stable Diffusion create the image. When it’s done, examine the result. Does it have the Ghibli vibe? If not, consider adjustments. Perhaps you forgot to include “ghibli” or an anime style hint in the prompt – add that and retry. If the image looks good but not Ghibli enough, you might actually benefit from using a dedicated model (see step 1) or injecting stronger style cues (like an artist name). If certain parts are off (say the character’s face is wonky), refine your prompt or negative prompts to address it (e.g. add “bad face, deformed” to negatives, or be more specific about the character’s appearance to guide the AI). Remember you can also generate a batch of images in SD by setting a number of outputs – this way you get multiple variations to choose from, just like Midjourney and DALL·E provide. Pick the closest match and then iterate on it.
Iterate and Refine: One of Stable Diffusion’s strengths is controllable iteration. You can take an output image that’s almost there and use it as a starting point for further refinement. For instance, use an img2img (image-to-image) approach: feed the image back into the model with the same prompt (or a slightly tweaked prompt) and a certain denoise strength to polish it. This can add detail or adjust the style while preserving the composition. ChatGPT can even suggest how to modify the prompt for a second pass (e.g. “try making the scene at sunrise with morning mist” for a different mood). Additionally, you have control over the random seed in Stable Diffusion – if you got a composition you like, you can reuse the same seed with small prompt changes to fine-tune specific elements without drastically changing the whole image. Conversely, if you want a totally different take, just use a new random seed. Keep iterating: change the lighting, add a detail, remove an object via negative prompt, or switch to a specialized model halfway. This process can be repeated until you’re satisfied. It may take a few generations, but each tweak guides the AI closer to your vision. Patience and experimentation are key here; you have virtually unlimited tries with SD, so feel free to play with it.
Save and Upscale (if needed): Once you get a result you love, save the image. If the final image is a bit small or lacking crispness, you can run it through an AI upscaler. Many Stable Diffusion tools have built-in upscaling (like ESRGAN or SwinIR) – this will increase the resolution and enhance details while maintaining the painted look. Upscaling is great for making sure your artwork looks good even on large screens or prints. After upscaling, you’ll have a high-quality, high-resolution image that truly looks like a frame from a Studio Ghibli film. Enjoy your creation!
(Note: Stable Diffusion offers unmatched control and customization – you can swap models, adjust every parameter, and generate as many variations as you want. For example, the Nitrosocke/Ghibli-Diffusion model we mentioned can very closely mimic the Studio Ghibli look when you use “ghibli style” in the prompt. The trade-off is that it may take more prompt tuning and technical effort to reach the perfect result. However, many SD-based services simplify this with one-click Ghibli presets (essentially pre-crafted prompts/models), which can give beginners a head start. Don’t be afraid to take advantage of those, and gradually learn to fine-tune on your own for even better results.)*
Step 7: Balance Creative Control with AI Randomness
One of the challenges (and joys) of using AI art tools is finding the sweet spot between directing the generation and letting the AI surprise you. Here are some tips on refining your results while balancing control vs. randomness:
Embrace Iteration: Rarely will a complex scene come out perfect on the first try. Think of your initial generations as rough drafts or concept sketches. Evaluate each result and decide what to keep or change. Maybe the composition is great but the colors are off – so you focus your next prompt on adjusting the palette. Or the style is spot-on but the character looks wrong – so you tweak the description of the character. By incrementally modifying prompts or settings, you can converge toward your ideal image. This iterative approach is exactly how an artist would refine a painting, and with AI it’s very much a dialogue between you and the model. Don’t hesitate to do multiple rounds; each iteration is a learning process.
Use Model Controls to Guide Creativity: All these tools offer parameters that effectively let you dial the AI’s “creativity” up or down. For instance, Midjourney’s --stylize value is essentially a creativity slider – a low stylize yields a more literal result strictly following your prompt, whereas a high stylize gives a more interpretative, artistic result that might deviate from prompt details. If you find that the AI is injecting too many random elements or straying from your concept, rein it in (e.g. lower the stylize, or in SD increase CFG scale closer to 9). On the other hand, if the outputs feel too bland or on-the-nose, you can introduce more randomness: allow Midjourney higher stylization, or in Stable Diffusion use a lower CFG or even add a phrase like “surreal” or an unexpected adjective to spur creativity. It’s a dance – tighten control when the structure or key elements need to be right, loosen it when you want the model to fill in imaginative flourishes.
Leverage Seeds and Variations: Some control comes from fixing aspects across iterations. In Stable Diffusion, seed reuse is powerful – if you loved the layout of an image but want to try a different style tweak, use the same seed with a new prompt (small changes) so the composition stays similar. In Midjourney, use the Variation (V) buttons or the --seed parameter to explore slight alterations of a favored image. This way you aren’t starting from scratch each time, and you can systematically explore alternatives (like “same scene but more moonlight”). Conversely, if you’re not getting what you want at all, change the seed (SD) or simply re-roll (MJ) to get a totally different starting point.
Don’t Over-Constrain the Prompt: A common pitfall is stuffing too many specific instructions into one prompt. If you describe every tiny detail and force multiple unrelated style tags, the AI can get confused or produce a stiff, unnatural image. Remember, Studio Ghibli’s art, while detailed, also feels organic. Allow the AI some breathing room to create. For example, instead of demanding “tree with exactly 5 branches, two birds on the third branch, a red flower on the left” (overly rigid), you might say “an old tree with birds and wildflowers around it” and let the AI paint the scene – it may put a few birds and flowers in a pleasing composition on its own. Often the unplanned details the AI adds (like an extra puff of cloud or a random forest creature peeking out) can enhance the Ghibli-esque charm of the image. If something truly unwanted appears, then guide the AI away from it (e.g. add to negative prompt, or explicitly say “empty sky” to avoid random floating objects, etc.). Aim to guide, not dictate – specify the crucial elements (character, setting, mood) and let the model have fun with the rest. This balance will yield the most delightful and authentic results.
Know When to Stop (or Start Over): Iteration is important, but also know that sometimes one generation may just not be hitting the mark due to how the AI interpreted your prompt. It’s fine to scrap an approach that isn’t working and rephrase the prompt entirely or try a different tool. Similarly, when you do get an image that you love, it’s okay to call it done! Not every image needs endless tweaking – part of the magic is in those slightly imperfect, organic qualities (just like a hand-drawn frame might have a bit of asymmetry).
In summary, treat the AI as a creative collaborator: you provide guidance and constraints, it provides novel ideas and execution. By adjusting parameters and prompt detail, you can control the outcome to a large degree, but leaving some randomness often brings out that spark of imaginative charm that is so characteristic of Studio Ghibli’s art.
Step 8: Comparing Prompt Examples Across AI Platforms
To further illustrate the differences in approach between Midjourney, DALL·E, and Stable Diffusion, here’s a quick example of how one might prompt the same scenario in each. Imagine we want an image of two children meeting a friendly forest spirit at night in a wooded area:
| Platform | Sample Prompt for the Scenario |
|---|---|
| Midjourney (Discord bot) | Two children meet a glowing forest spirit under tall trees at night, Studio Ghibli style, soft blue moonlight filtering through leaves, fireflies floating around. --ar 16:9 --niji 5 (Uses the Niji anime model and a 16:9 aspect ratio for a wide cinematic scene.) |
| DALL·E 3 (ChatGPT/Bing) | Two children encountering a friendly, glowing forest spirit at night beneath towering trees, in the style of a Studio Ghibli animation. Soft blue lighting, fireflies in the air, and a calm, magical atmosphere. |
| Stable Diffusion (Custom model) | ghibli style illustration of two children standing under towering trees at night, meeting a gentle glowing forest spirit. Soft blue ambient light, fireflies sparkle around, detailed hand-painted look. Negative prompt: blurry, low-detail, realism, text, extra limbs |
Notes: In the Midjourney prompt, we included the --niji 5 flag to activate the anime-focused model, and --ar 16:9 for aspect ratio. The DALL·E prompt is written in natural language and relies on the phrase “in the style of a Studio Ghibli animation” to set the style (no extra parameters needed). The Stable Diffusion prompt uses the token “ghibli style” (assuming a model that recognizes it) and we explicitly wrote a negative prompt to avoid realism or errors. All three prompts describe the same core scene, but tailored to each platform’s syntax. You can see Midjourney and SD allow a bit more technical specification (flags and negative prompts), whereas DALL·E is more about the pure description. Despite these differences, all three should ideally produce a very similar image concept – two kids, a glowing spirit, nighttime forest, with that Ghibli magic.
Step 9: Tips, Best Practices, and Pitfalls to Avoid
Finally, let’s cover some general recommendations for different users, and highlight a few common pitfalls so you can avoid them from the get-go:
For Beginners: If you’re new to AI image generation, start simple. Use tools that do a lot of the heavy lifting for you, like Bing Image Creator or ChatGPT with DALL·E 3, where you can just describe what you want in plain language. These tend to understand the Ghibli style without much fuss. You can also leverage community resources – for example, look up ready-made Ghibli prompts on prompt sharing sites or forums, and modify them for your needs. Don’t worry about mastering every parameter on day one; focus on one aspect at a time. You might first try generating a character with a basic prompt, then gradually add in a background description, then experiment with a lighting adjective, etc. This way you learn how each addition affects the output. Another great approach is to use services that have one-click Ghibli filters or models – these will automatically apply the style, letting you concentrate on the content of the image. As you get comfortable, you can move on to more advanced tools or settings. And remember, if results look odd initially, it’s not you – every AI has a learning curve. Keep iterating and don’t be afraid to ask the AI for help (e.g. using ChatGPT to polish your prompt).
For Hobbyists/Intermediate Users: Once you have the basics down, challenge yourself to experiment further. Try out Midjourney for its superb art quality – get used to using --ar for aspect ratios and --no for negative prompting to refine outputs. Or dive into Stable Diffusion with a hosted notebook or local install; play with custom models like the Ghibli Diffusion model for potentially even closer style matches. At this stage, engage with the community: share your Ghibli-style creations on Reddit or Discord, and learn from others’ prompts and settings. Often, communities will have prompt tips (like using certain lesser-known keywords or combinations) that can elevate your results. You should also practice more prompt engineering: try longer prompts vs. shorter prompts, test different synonyms (e.g. “mystical” vs “magical”), and see how they influence the image. As a hobbyist, you have the freedom to really explore the AI’s capabilities. Just be mindful of the time – it’s easy to spend hours tweaking prompts because it’s so fun! Save versions of prompts that worked well so you can reuse or build on them later.
For Experienced Digital Artists: Use AI as a tool in your pipeline. As an experienced artist, you might combine AI generation with your own painting or editing skills. For example, you can generate a complex scene in Stable Diffusion, then import it into Photoshop or Procreate to touch up character faces or add fine details that the AI missed. You can also train your own models or fine-tune existing ones with your art style merged with Ghibli’s (if you have the technical know-how and data). Advanced techniques like ControlNet (for controlling poses or compositions in SD) or inpainting (to fix specific areas) can be incredibly useful to fix the quirks that AI may produce. If you’re comfortable coding or using APIs, you can chain models together – e.g., use one AI pass to sketch a scene layout, another for colorization, etc. At this level, you’re not just accepting whatever the AI gives; you’re art-directing it heavily. Also consider the ethics and originality: use the AI to inspire and create new works, not to plagiarize. For instance, rather than trying to recreate a screenshot of Spirited Away exactly, use the tools to make a new scene that feels like Spirited Away. This respects the spirit of the art and showcases your creativity.
Best Practices: Regardless of skill level, some practices are universally helpful. Keep your prompts concise but meaningful – avoid irrelevant words that might confuse the AI. Iterate methodically: change one aspect at a time so you can tell what caused any difference in output. Use reference images (even rough sketches) if the tool allows, since a picture can guide composition better than words in many cases. And always save your work and prompts so you can revisit a previous idea later or improve upon it. If you get a fantastic result, note down what prompt and settings achieved it! This builds your own library of “prompt recipes.”
Pitfalls to Avoid: One pitfall is overloading the prompt with too many style references – e.g. asking for “Ghibli style, Pixar style, Disney style all at once” will muddle the result; stick to one cohesive style at a time (you can mix for experimentation, but know it might compromise coherence). Another pitfall is ignoring the limitations: AI image generators can’t read your mind, so if something is essential (like a character’s red umbrella), you must mention it. Conversely, if you never mention an aspect, the AI will fill it randomly – which might not be what you want (e.g. if you don’t specify time of day, it might choose daylight by default). So try to anticipate what needs stating. Watch out for artifacts: things like jumbled text, extra limbs, or distorted features are common issues. Use negative prompts and manual editing to handle these. Also, manage your expectations – while AI can produce astonishingly Ghibli-like images, it’s not truly hand-drawn animation art. There may be small differences or quirks. That’s okay, and often the images are impressive in their own right. Finally, ensure you have the right usage rights for your outputs (most AI tools allow you to use your creations freely, but check their policies, especially if you plan to sell prints or use commercially).
By following these guidelines, you’ll avoid common mistakes and steadily improve your results. Each tool has its learning curve and each artist (that’s you!) will develop their own style of prompt-crafting.
Conclusion:
Mastering the Ghibli aesthetic with AI is a journey that combines your creativity with the model’s capabilities. You’ve learned how color, character, and scenery define the Ghibli style and how to communicate those elements in prompts for Midjourney, DALL·E, and Stable Diffusion. With practice, you’ll get better at translating the enchanting qualities of films like Totoro or Spirited Away into your AI-generated images. Remember to be patient and enjoy the process – after all, even Miyazaki’s team perfects their art frame by frame, and so will you, one generation at a time. Now grab those prompts and start creating your own Ghibli-esque worlds. Happy prompting, and may your imagination take you on a fantastical flight!